[ Published on -
Using Ant in Flash Builder is really simple, like press button, but writing Ant buildfile may require a little bit more effort and knowledge.
If you don't have Ant installed and you don't know how to install it to Flash Builder, than read:
Installing Ant to Flash Builder (flex) 4
There are lot's of tutorials on the Internet on how to create Ant buildfiles, but now when you are already here and are reading this line :) , I will show you how to write a simple Ant buildfile.
Ant buildfiles are simple xml files, so if you are already familiar with xml you won't have trouble understanding them.
Every buildfile contains one "project" and at least one "target".
Project element contains attributes: "name" (project name), "default" (default target to run when no target is provided) and "basedir" (directory from which all path calculations are done)
Targets contain task elements.
Tasks are piece of code that can be executed (compile, copy, create dir, delete dir, upload to ftp...).
Project also can contains properties.
Properties are "variables".
Here is a simple Ant buildfile:
<project name="AntTest" default="Copy to Dir" basedir=".">

    <property name="src" value="src"/>
    <property name="build" value="build"/>

    <target name="Create Dir">
         <mkdir dir="${build}"/>
    </target>

    <target name="Copy to Dir" depends="Create Dir">
         <copy file="${src}/AntTest.mxml" tofile="${build}/CopyOfAntTest.mxml" verbose="true" />
    </target>

    <target name="clean" description="Deletes Created Dir">
          <delete dir="${build}"/>
    </target>

</project>
So let's fast see what we have here:
In a first line we are creating project with name "AntTest" with base dir "." (current dir where build file resides) and with default target "Copy to Dir"
<project name="AntTest" default="Copy to Dir" basedir=".">
In next two lines we are creating properties (variables) "src" with a path to our "src" dir in "AntTest" project and "build" with a path to, at the moment, non existing dir.
    <property name="src" value="src"/>
    <property name="build" value="build"/>
Finaly, here is a first target :). Here, we are creating target with the name "Create Dir" that contains task "mkdir".
"mkdir" task creates new directory at a "build" path, "build" path that we declared in previous lines.
"${build}" means that it will be replaced by "build" value (build path)
    <target name="Create Dir">
       <mkdir dir="${build}"/>
   </target>
Here we are creating second target with name "Copy to Dir". This target depends on target with name "Create Dir" which means that if we execute "Copy to Dir" target that first will be executed "Create Dir" and then "Copy to Dir". "Copy to Dir" target contains "copy" task.
"copy" task will copy file "AntTest.mxml" from "src" dir to "build" dir and will rename file to "CopyOfAntTest.mxml".
<target name="Copy to Dir" depends="Create Dir">
    <copy file="${src}/AntTest.mxml" tofile="${build}/CopyOfAntTest.mxml" verbose="true" />
</target>
At the end we have target with name "clean" and description "Deletes Created Dir". Target contains "delete" task.
"delete" task simple deletes "build" dir.
<target name="clean" description="Deletes Created Dir">
    <delete dir="${build}"/>
</target>
Now it's time to use our code.
Open Flash Builder and create new Flex project with the name "AntTest" (any other valid project name will be ok).
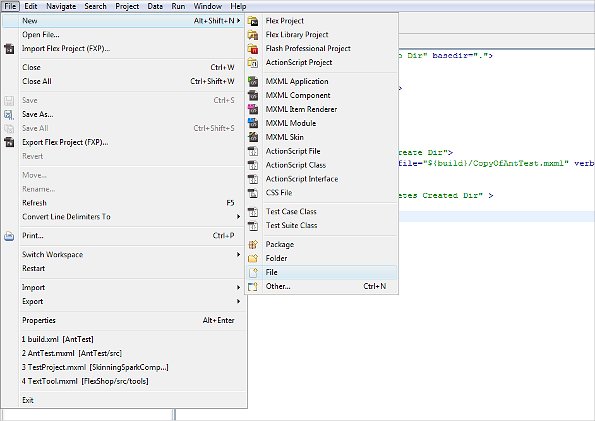
In the package explorer right click on the "AntTest" project and pick "New -> File" and add it name "build.xml"
In the root of the project you should see "build.xml" file you just created

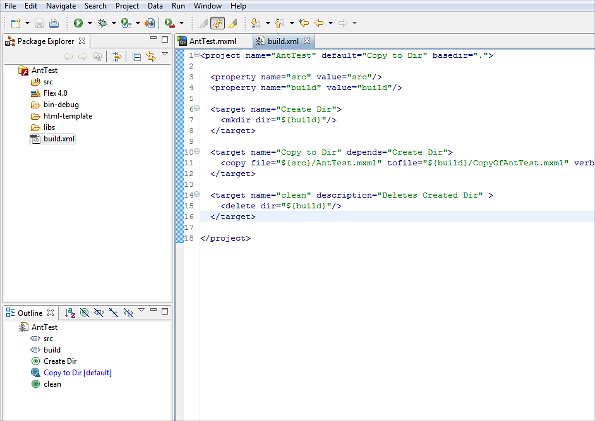
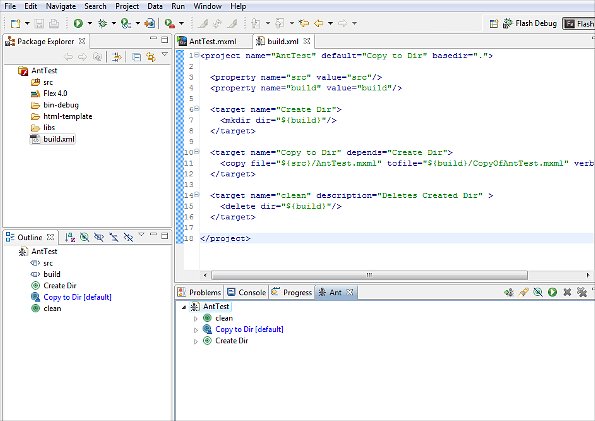
Open "build.xml" file in editor, paste "xml" code to it, and save.
You should see something like this:
Go to Flash Builder menu "Window -> Other Views". Window "Show View" will pop up.
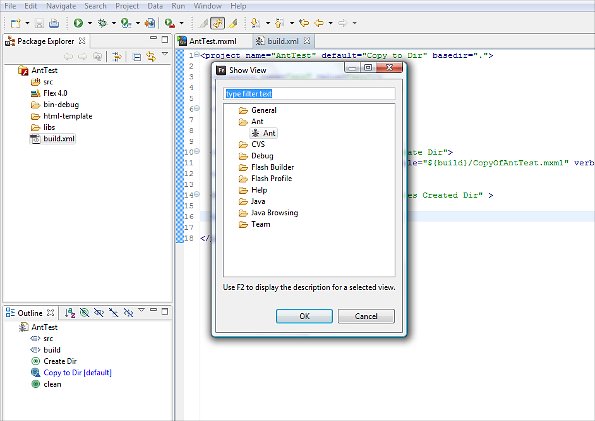
Select "Ant" and press "OK"
Ant window will open:
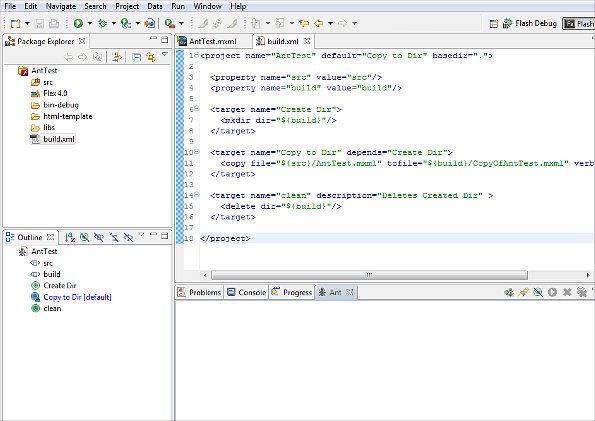
Press button "Add Buildfiles" (it's placed next to "Ant" tab), "Buildfile Selection" window will pop up.
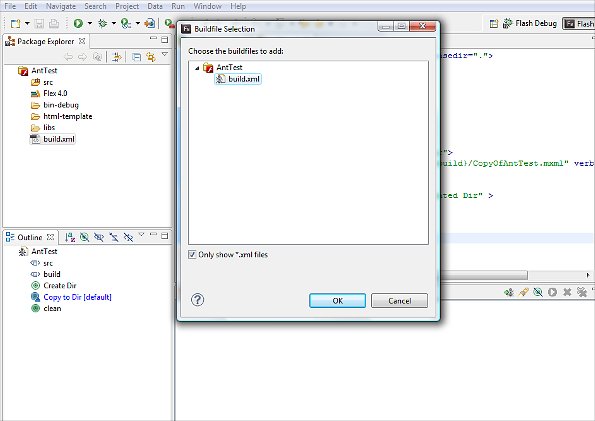
Buildfile is loaded into Ant window. You can now browse buildfile targets in the Ant window.
Now we can run Ant targets. There are few places from where we can run them:
- Ant window - select target and press button "Run the selected target"
- Ant window - right mouse click on target and from menu choose "Run As -> Ant Build"
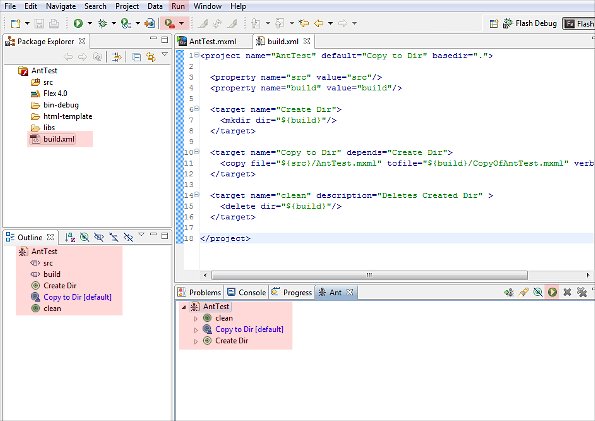
- Package Explorer window - right click on "build.xml" and from menu choose "Run As -> Ant Build"
- Flash Builder toolbar - button "External Tools"
- Flash Builder menu - "Run -> External Tools" (only if you have favorites)
- Flash Builder menu - "Run -> External Tools -> Run As -> Ant Build"
- Outline - right mouse click on target and from menu choose "Run As -> Ant Build" (only if Ant buildfile is in focused editor)
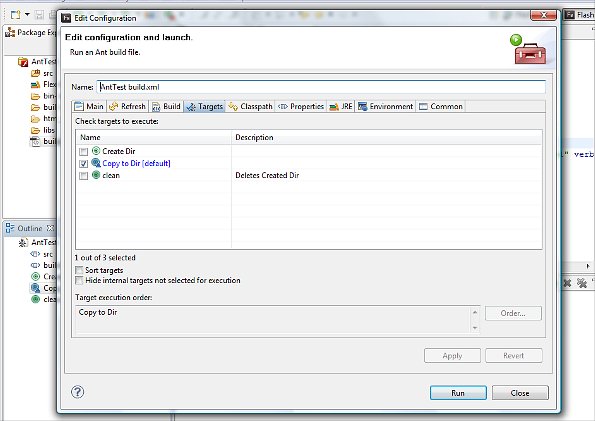
After running the target, window "Edit Configuration" will popup (not always).
In this window, as the window name says, you can edit configuration manage target execution order...
Click "Run"
Finally we see in the console the ouput from our executed tasks
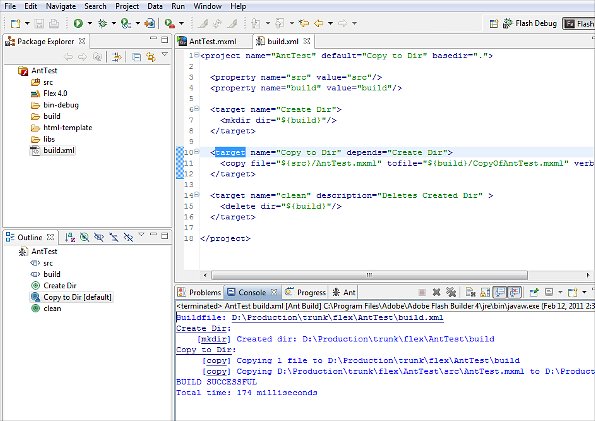
If everything ends OK, you should have "build" directory in root of your "AntTest" project, including copy of file "AntTest.mxml" with new name "CopyOfAntTest.mxml"
Now you are ready to create more complex Ant buildfiles :)
Read next: Ant - Complete Automation